Nutnaix Community Edition をインストールしてみたので、メモを残しておく。構成はNutanixCEを3台導入し、クラスタを組んでみた。最後にLCMを利用し6.8から最新の6.10にバージョンアップもしている。
参考情報、ISOのDL先
参考した情報は以下の通り。
■システム要件
Community Edition CE 2.1 – Recommended Hardware for Community Edition
■インストール手順
Community Edition CE 2.1 – Installing Community Edition
■Nutanix CE ダウンロード
Download Community Edition | Nutanix Community
※MyNutanixにログインしている状態でアクセスする必要あり
導入構成
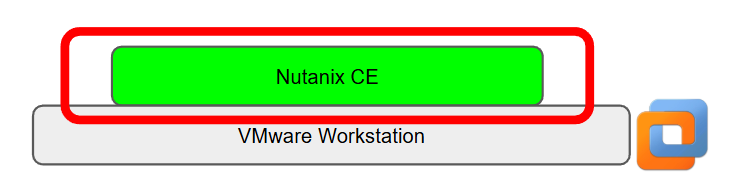
構成は下図の通り。VMware Workstationの上に導入している。
Nutanix CEマシンの構成は下表のとおり。
| 今回の構成 | 最小要件 | |
| CPU | 4vCPU | 4core |
| メモリ | 24GB | 32GB |
| ディスク ブート | 32GB | 32GB |
| ディスク コールド(COLD) | 500GB | 500GB |
| ディスク ホット(HOT) | 200GB | 200GB |
| NIC | 10Gbps | 1Gbps |
Nutanixのインストール1台構
※3台構成のクラスタ版は、後半に記載している。
導入のみであれば、とてもシンプルだ。
仮想マシンから、ダウンロードしたISOイメージをブート後、初めにブートデバイスを選択する。
その後、ハイパーバイザー、CVM、サブネット、ゲートウェイのアドレスを設定し、Next Pageを選択する。
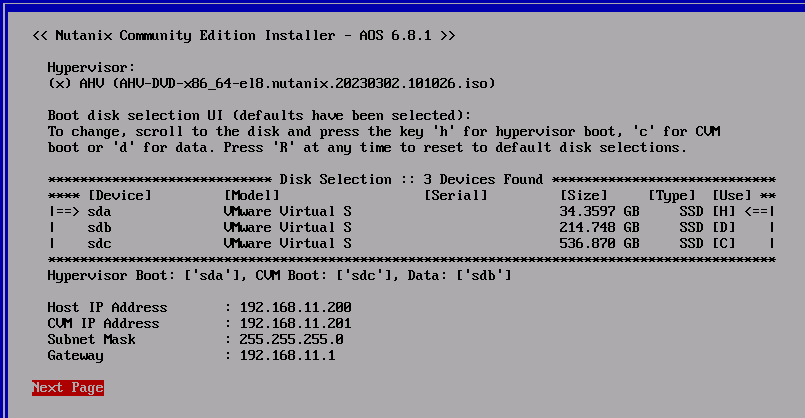
マニュアルに記載されている通り、Nutanix CEは内部用に192.168.5.0/24の範囲を予約しているため、設定では利用しないようにすること
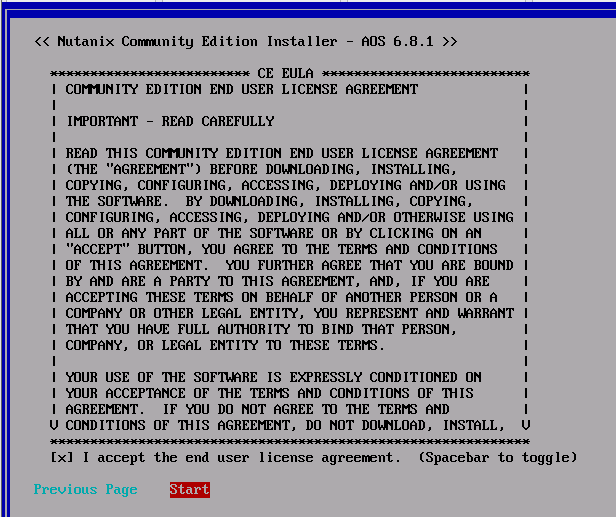
その後、ライセンス条項の内容をすべて確認し、同意(スペースで選択)後、Startを選択するとインストールが始まる。
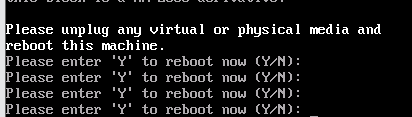
20~30分くらい(環境による)で、導入が終わるため、ISOイメージを取り外し、Yを選択し再起動する。
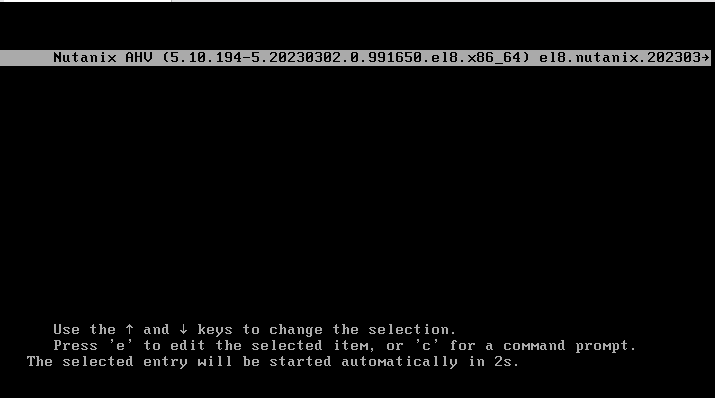
再起動後、はHypervisorの起動画面となる。
ホストが正常に再起動されると、20分くらい待つと、CVMの初期セットアップが終了するため、SSHで接続できるようになっているはずだ。
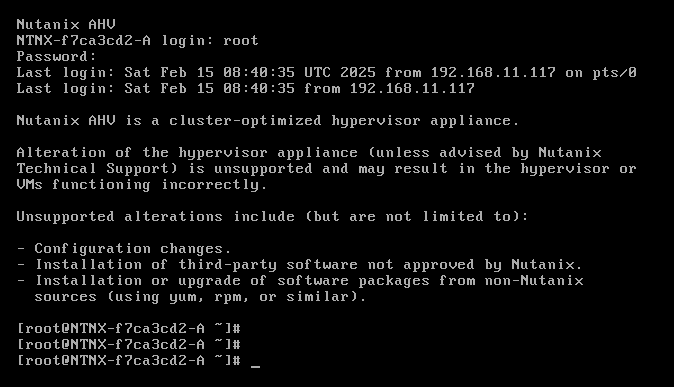
なお、Realtek NICのドライは初期状態では利用できないため、マニュアルに記載されている通り、以下の設定が必要だ。
//rootユーザでログインするが、Nutanixで使われているデフォルトパスワードでログイン可能だ。

Nutanix AHV is a cluster-optimized hypervisor appliance.

Alteration of the hypervisor appliance (unless advised by Nutanix
Technical Support) is unsupported and may result in the hypervisor or
VMs functioning incorrectly.

Unsupported alterations include (but are not limited to):

- Configuration changes.
- Installation of third-party software not approved by Nutanix.
- Installation or upgrade of software packages from non-Nutanix
  sources (using yum, rpm, or similar).

Last login: Sat Feb 15 05:17:34 UTC 2025 on tty1
Last login: Sat Feb 15 05:17:34 2025
[root@NTNX-369d8642-A ~]#
[root@NTNX-369d8642-A ~]#
[root@NTNX-369d8642-A ~]#
[root@NTNX-369d8642-A ~]# dracut -f --add-drivers realtek /boot/initramfs-$(uname -r).img
[root@NTNX-369d8642-A ~]# rm /root/.firstboot_fail
rm: cannot remove '/root/.firstboot_fail': No such file or directory
[root@NTNX-369d8642-A ~]#
[root@NTNX-369d8642-A ~]# touch /root/.firstboot
[root@NTNX-369d8642-A ~]# reboot
クラスタの作成
まず、VMware Workstationのコンソール、ないしTeratermなどで、AHVにSSHでログインする。
ユーザ名:root
パスワード:nutanix/4u
AHVにログイン後、CVMにアクセスする。192.168.5.2に対してPingは飛ばないが、SSH接続はできるはずだ。
ユーザ名:nutanix
パスワード:nutanix/4u
// nutanixユーザで接続する

[root@NTNX-f7ca3cd2-A ~]# ssh nutanix@192.168.5.2
The authenticity of host '192.168.5.2 (192.168.5.2)' can't be established.
ECDSA key fingerprint is SHA256:ie9xM8yvp3JbJDt7I+vMAa2B2MHxQsQofY6cwnflmTE.
Are you sure you want to continue connecting (yes/no/[fingerprint])? yes
Warning: Permanently added '192.168.5.2' (ECDSA) to the list of known hosts.
Nutanix Controller VM
nutanix@192.168.5.2's password:

Nutanix Controller VM (CVM) is a virtual storage appliance.

Alteration of the CVM (unless advised by Nutanix Technical Support or
Support Portal Documentation) is unsupported and may result in loss
of User VMs or other data residing on the cluster.

Unsupported alterations may include (but are not limited to):

- Configuration changes / removal of files.
- Installation of third-party software/scripts not approved by Nutanix.
- Installation or upgrade of software packages from non-Nutanix
  sources (using yum, rpm, or similar).

** SSH to CVM via 'nutanix' user will be restricted in coming releases.  **
** Please consider using the 'admin' user for basic workflows.           **
Last login: Sat Feb 15 08:42:08 UTC 2025 from 192.168.5.1 on ssh
Last failed login: Sat Feb 15 08:42:11 UTC 2025 from 192.168.5.1 on ssh:notty
There was 1 failed login attempt since the last successful login.
Last login: Sat Feb 15 08:42:13 2025 from 192.168.5.1
nutanix@:192.168.11.201:~$
nutanix@:192.168.11.201:~$
初期構築時に入力したCVMのIPアドレスを指定し、シングル構成でのクラスタを作成する。
nutanix@:192.168.11.201:~$
nutanix@:192.168.11.201:~$
nutanix@:192.168.11.201:~$ cluster -s 192.168.11.201 --redundancy_factor=1 create
2025-02-15 08:48:42,096Z WARNING ThreadPoolExecutor-0_0 genesis_utils.py:1882 Failed to reach a node where Genesis is up. Ensure Genesis is running on all CVMs. Retrying...(Hit Ctrl-C to abort)
2025-02-15 08:48:43,098Z WARNING ThreadPoolExecutor-0_0 genesis_utils.py:1882 Failed to reach a node where Genesis is up. Ensure Genesis is running on all CVMs. Retrying...(Hit Ctrl-C to abort)
上記Warningが出る理由はいろいろとあるが、今回はとにかく、待つ。
しかし、2,3時間近く待ったが、Genesisなどステータスが正常にならなかった。そのため、上記同様の手順で、CE2.0を導入することとした。ほぼ同じ手順で、問題なくCE2.0、LCMでのバージョンアップ作業が完了した。以下、ISOイメージで導入直後からのログとなる。
//Nutanix CEデフォルトのIPアドレスとなる、CVMにアクセスしてみる

[root@NTNX-ff5fa445-A ~]#
[root@NTNX-ff5fa445-A ~]#
[root@NTNX-ff5fa445-A ~]# ssh nutanix@192.168.5.2
FIPS mode initialized
The authenticity of host '192.168.5.2 (192.168.5.2)' can't be established.
ECDSA key fingerprint is SHA256:BS2rlBnYnsqJdA0HpDqfEd1bfjJkdi2w0Qok9LT8gnM.
ECDSA key fingerprint is SHA1:N94NYs/sX/+zwzQOTOi+BNM0MK0.
Are you sure you want to continue connecting (yes/no)? yes
Warning: Permanently added '192.168.5.2' (ECDSA) to the list of known hosts.
Nutanix Controller VM
nutanix@192.168.5.2's password:
Last login: Sun Feb 16 01:05:17 UTC 2025
Last login: Sun Feb 16 01:06:39 2025 from 192.168.5.1

Nutanix Controller VM (CVM) is a virtual storage appliance.

Alteration of the CVM (unless advised by Nutanix Technical Support or
Support Portal Documentation) is unsupported and may result in loss
of User VMs or other data residing on the cluster.

Unsupported alterations may include (but are not limited to):

- Configuration changes / removal of files.
- Installation of third-party software/scripts not approved by Nutanix.
- Installation or upgrade of software packages from non-Nutanix
  sources (using yum, rpm, or similar).

** SSH to CVM via 'nutanix' user will be restricted in coming releases.  **
** Please consider using the 'admin' user for basic workflows.           **
nutanix@NTNX-ff5fa445-A-CVM:192.168.11.201:~$

//問題なくCVMにアクセスできたため、Genesis、クラスタのステータスを確認してみる
nutanix@NTNX-ff5fa445-A-CVM:192.168.11.201:~$
nutanix@NTNX-ff5fa445-A-CVM:192.168.11.201:~$ genesis status
2025-02-16 01:07:51.813464: Services running on this node:
  foundation: []
  genesis: [3008, 3124, 3148, 3149]
nutanix@NTNX-ff5fa445-A-CVM:192.168.11.201:~$
nutanix@NTNX-ff5fa445-A-CVM:192.168.11.201:~$
nutanix@NTNX-ff5fa445-A-CVM:192.168.11.201:~$ cluster status
2025-02-16 01:08:05,032Z INFO MainThread zookeeper_session.py:191 cluster is att                                    empting to connect to Zookeeper
2025-02-16 01:08:05,041Z INFO Dummy-1 zookeeper_session.py:625 ZK session establ                                    ishment complete, sessionId=0x1950c4c373a000b, negotiated timeout=20 secs
2025-02-16 01:08:05,051Z INFO MainThread cluster:2943 Executing action status on                                     SVMs 192.168.11.201
The state of the cluster: start
Lockdown mode: Disabled

        CVM: 192.168.11.201 Up, ZeusLeader
                                Zeus   UP       [12112, 12160, 12161, 12162, 121                                    72, 12189]
                    SysStatCollector DOWN       []
                           IkatProxy DOWN       []
                    IkatControlPlane DOWN       []
                       SSLTerminator DOWN       []
                      SecureFileSync DOWN       []
                              Medusa DOWN       []
                  DynamicRingChanger DOWN       []
                              Pithos DOWN       []
                          InsightsDB DOWN       []
                              Athena DOWN       []
                             Mercury DOWN       []
                              Mantle DOWN       []
                            Stargate DOWN       []
                InsightsDataTransfer DOWN       []
                               Ergon DOWN       []
                             GoErgon DOWN       []
                             Cerebro DOWN       []
                             Chronos DOWN       []
                             Curator DOWN       []
                               Prism DOWN       []
                                Hera DOWN       []
                                 CIM DOWN       []
                        AlertManager DOWN       []
                            Arithmos DOWN       []
                             Catalog DOWN       []
                           Acropolis DOWN       []
                               Uhura DOWN       []
                   NutanixGuestTools DOWN       []
                          MinervaCVM DOWN       []
                       ClusterConfig DOWN       []
                         APLOSEngine DOWN       []
                               APLOS DOWN       []
                     PlacementSolver DOWN       []
                               Lazan DOWN       []
                             Polaris DOWN       []
                              Delphi DOWN       []
                            Security DOWN       []
                                Flow DOWN       []
                             Anduril DOWN       []
                               XTrim DOWN       []
                       ClusterHealth DOWN       []
2025-02-16 01:08:06,461Z INFO MainThread cluster:3104 Success!
nutanix@NTNX-ff5fa445-A-CVM:192.168.11.201:~$
上記の通り、ほぼ同じ手順で導入していた、CE2.0、AOS6.5系は無事に導入できた。
次に設定した、CVMのIPアドレスにブラウザでアクセスしてみる。
https://192.168.11.201:9440にアクセスするとログインページが表示される。
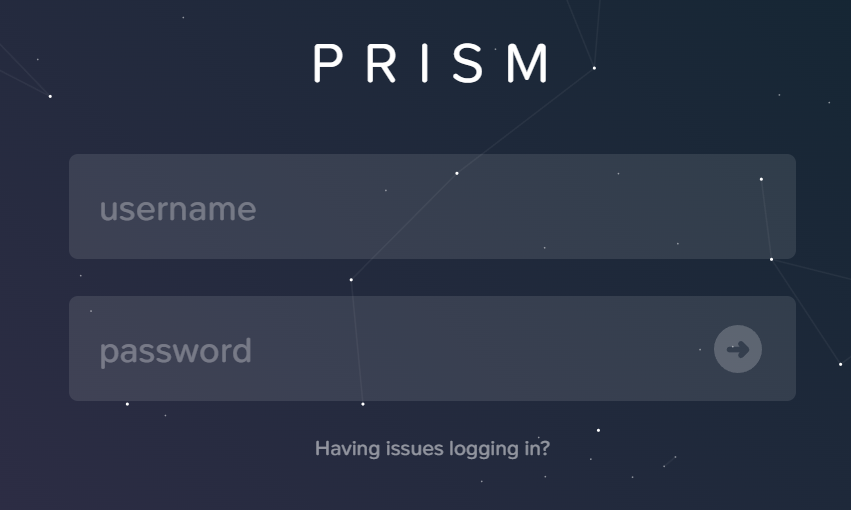
ここで、管理コンソールが表示されない場合、表示された状態で「thisisunsafe」と入力後にエンターを押すと、この画面が表示されるはずだ。なお「thisisunsafe」を入力しても、どこにも入力内容は表示されない。
上記ログインの初期情報は以下の通りだ。
username:admin
passowod:nutanix/4u
初期ログイン時にパスワードの再設定がひつようとなるため、 適宜設定してほしい。
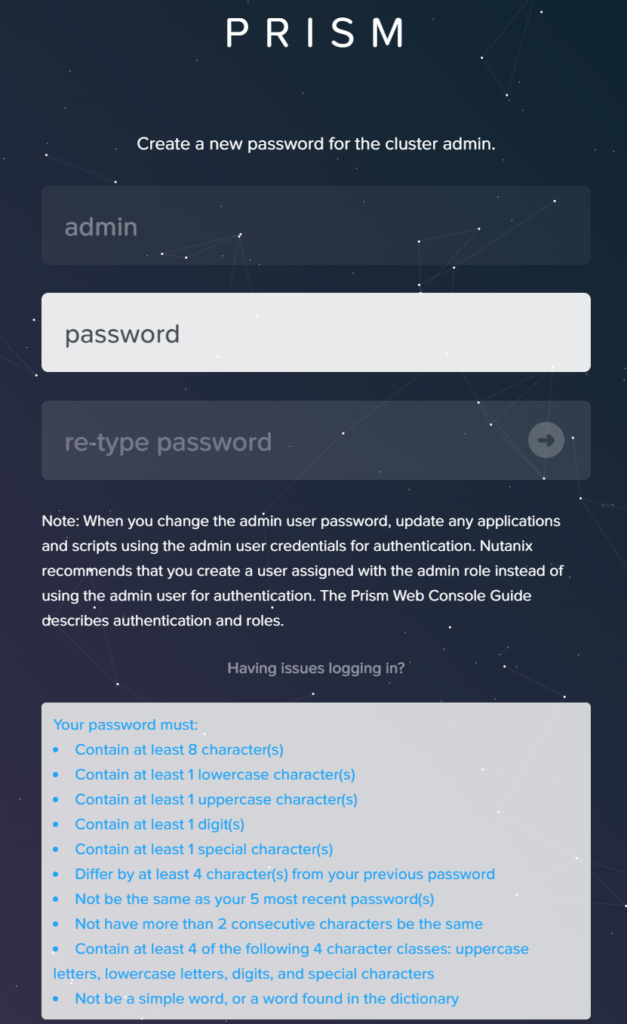
再設定したパスワードを入力すれば、ログインすることができるはずだ。

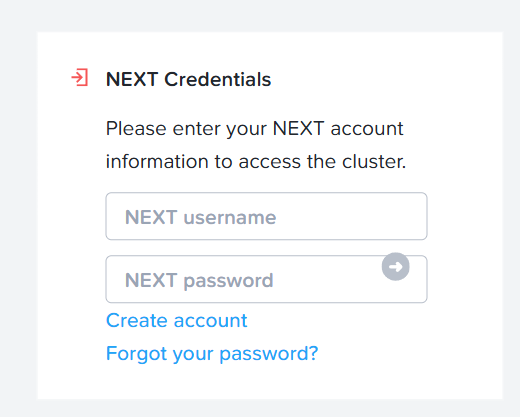
ログインすると、NutanixのNextアカウントでclusterのアクセスが必要となるため、適宜入力する。
アカウントを持っていない場合、CEを利用できないため、まずはアカウントを作成してほしい。そのご後、再度この画面で必要な情報を入力しよう。
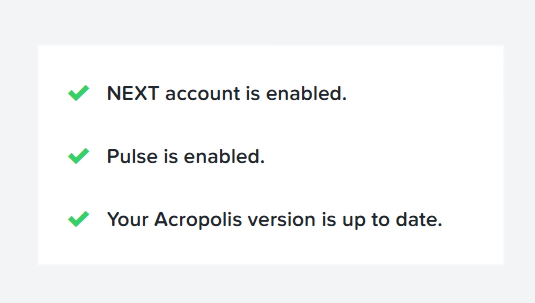
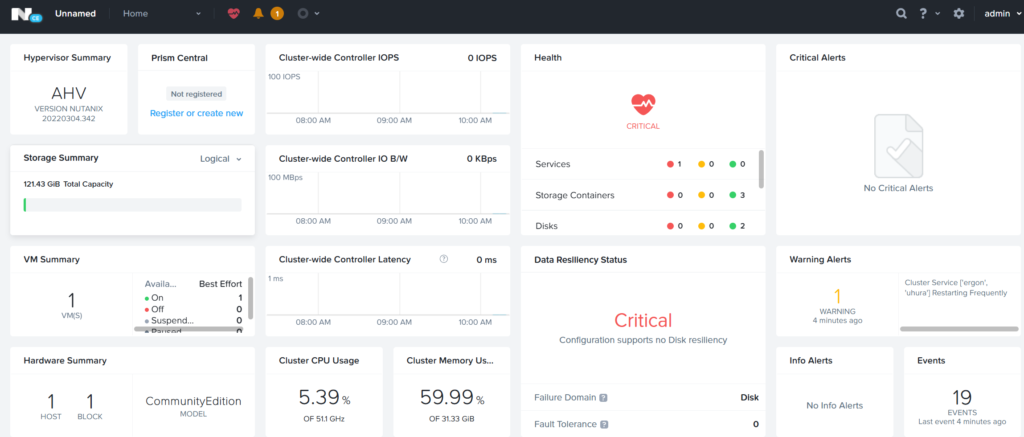
上記情報を正しく入力すると、以下の画面が表示され、数秒末とPrism Elementのダッシュボードが表示されるはずだ。
3台構成版
※2025年4月11日追記
3台構成版は、CE2.1で1台ずつ初期インストールを行いCVMにSSHでログインできる状態にする。
各CVMで、以下のコマンドを実行し、foudationとgenesisが起動していることを確認できたら、クラスタを組む。
$ genesis status
foundation:
genesis:
上記コマンドを各CVMで実行し、起動していることを確認出来たら、いずれか1台のCVMで以下のコマンドを実行する。
$ cluster -s 192.168.11.221,192.168.11.222,192.168.11.223 create
本コマンド実行後、30分くらい待つ

$ cluster status
ブラウザでコンソールにログイン後、下図の「cluster」の画面から、ClusterのIPアドレスを設定する。
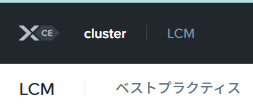
設定後は、クラスタIPでコンソールに接続できるようになる。
バージョンアップ
CE2.0関連のコンポーネントを最新にしたいため、LCMを利用しバージョンアップしてみる。
あわせて、最低限のクラスタ名と、日本語表示も実施した。
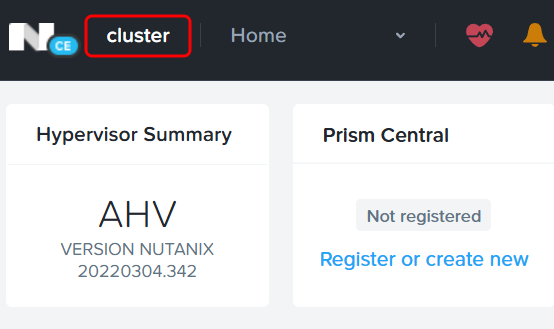
クラスタ名は、左上の部分からへんこうできる。
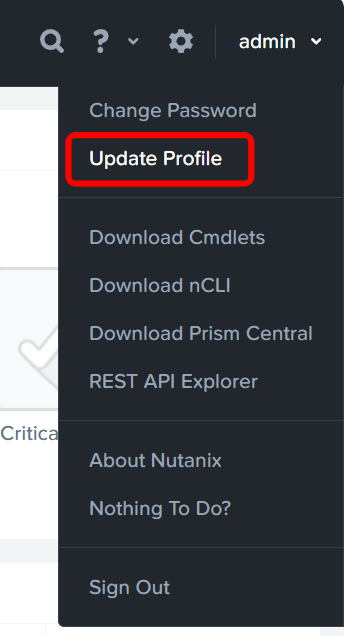
日本語は、Profileからだ。
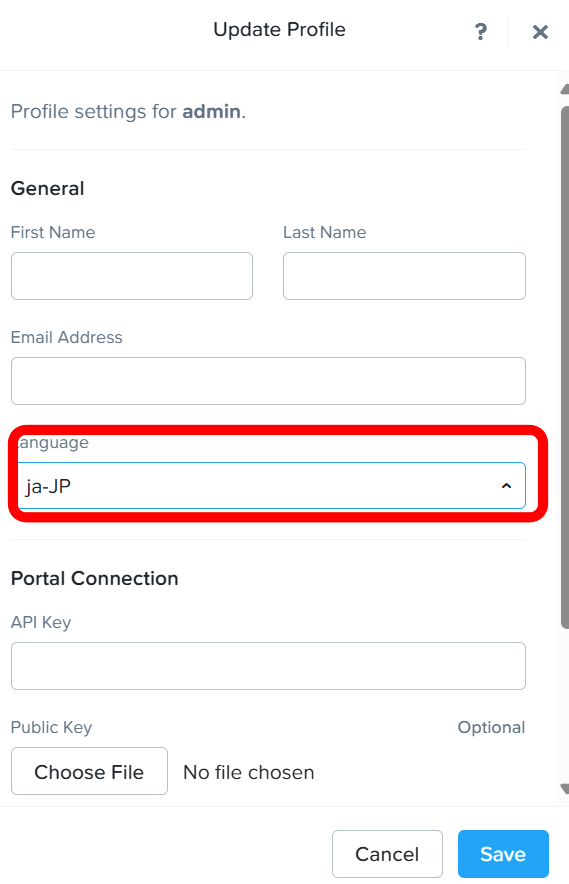
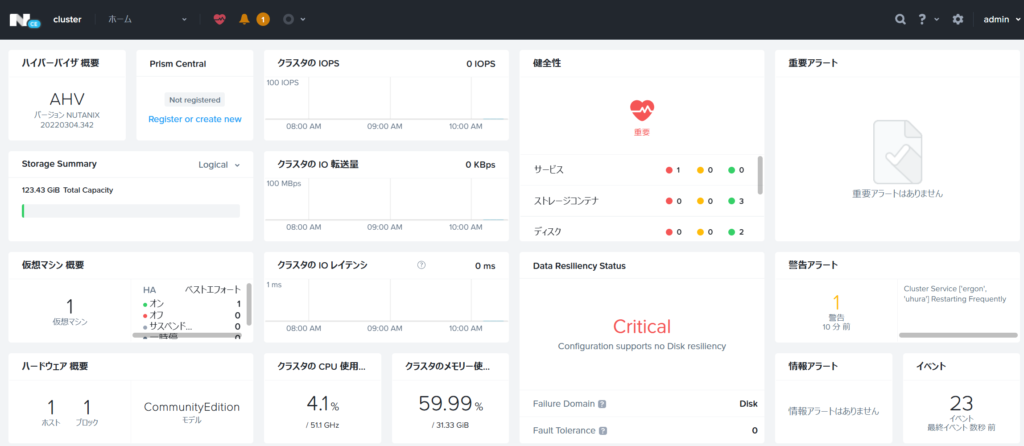
Saveを押した後、再度サインインしなおすと、下図の通り日本語表示になっているはずだ。
では、バージョンアップを進める。
バージョンアップには、LCM(Life Cycle Manager)という機能を利用する。
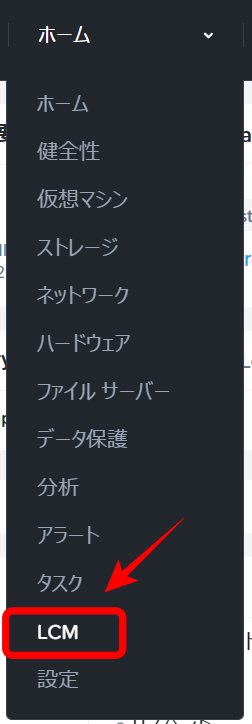
インベントリを実行し、最新バージョンを確認する。
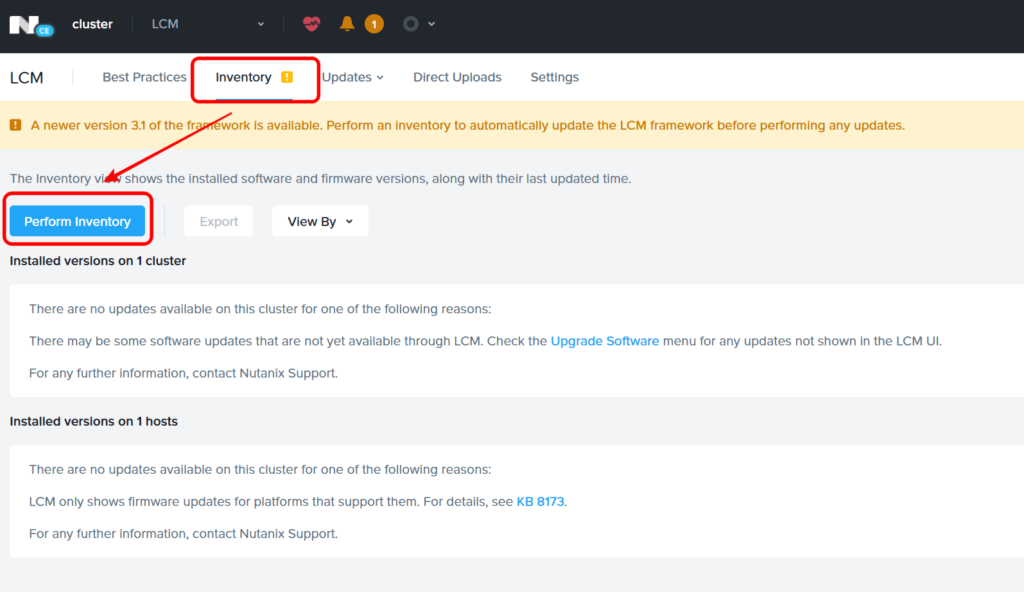
LCMの自動インベントリや、NCCの自動アップデートなど適宜環境に合わせ設定し、Proccedを選択だ。

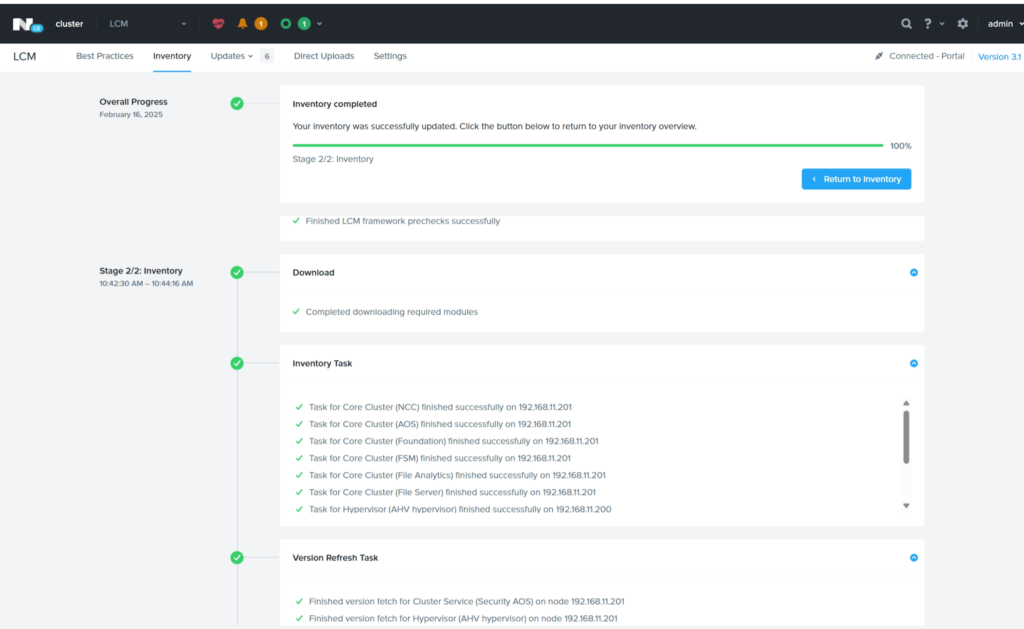
バージョンアップ可能なもののチェックが開始される。

数分後。右上のLCMのバージョンも2.5.0.2から3.1にかわり、すべてのチェックが完了した。
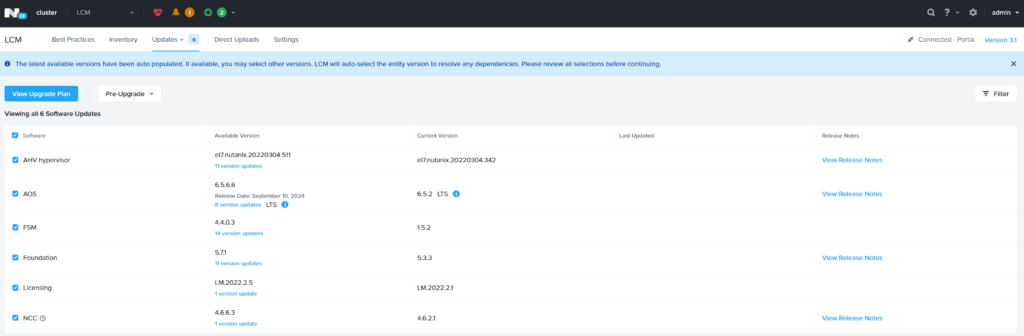
Updateのsoftwareを選択すると、バージョンアップ可能な項目一覧が表示される。
作業前後で、必ずNCCを実行し、正常性の確認をしておく。
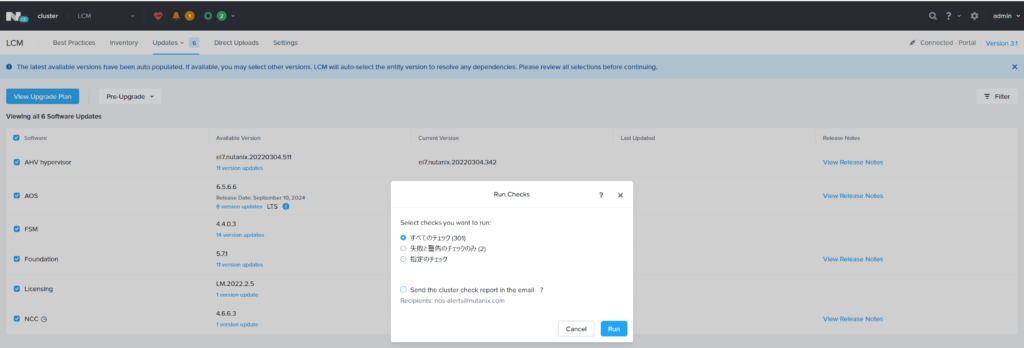
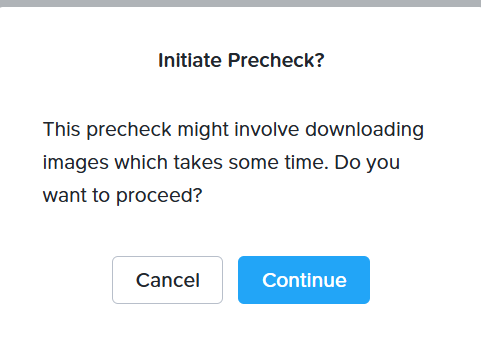
UpgrageのPrecheckを通す。
ここで、クリアしない場合は、一つずつ解決し、再度チェックしてほしい。
問題なくチェックが終わったらバージョンアップだ。
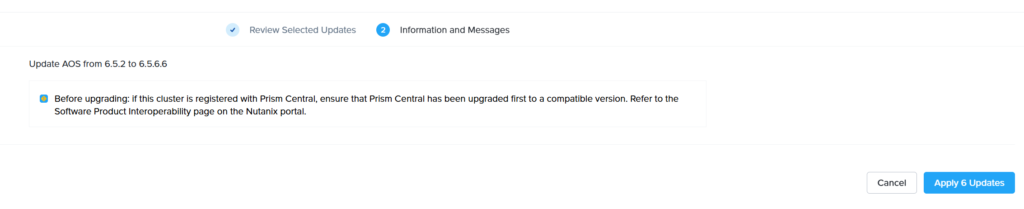
Upgrage Planを選択し、プランを確認する。
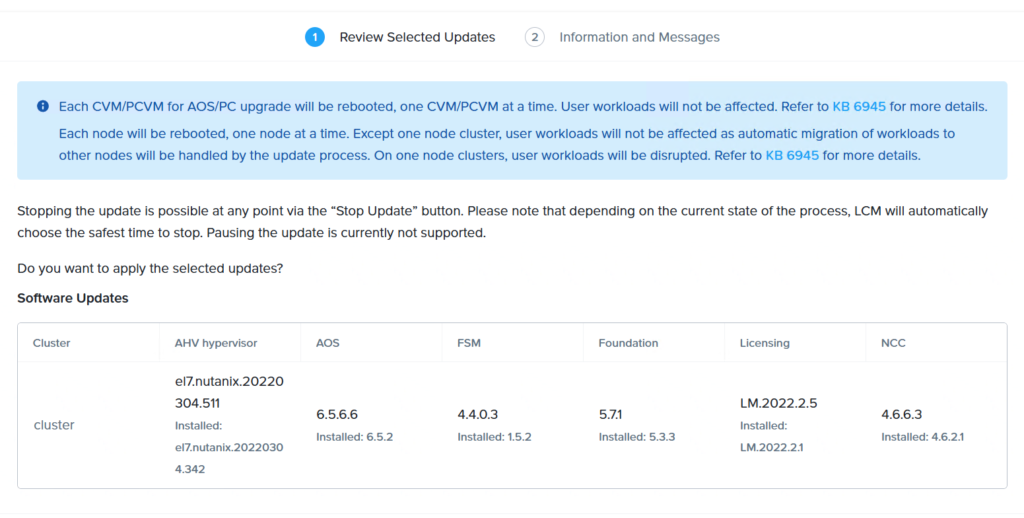
では、アップデート開始だ。なおPrismCEが登録されている場合は、事前に互換性などのチェックが必要だ。
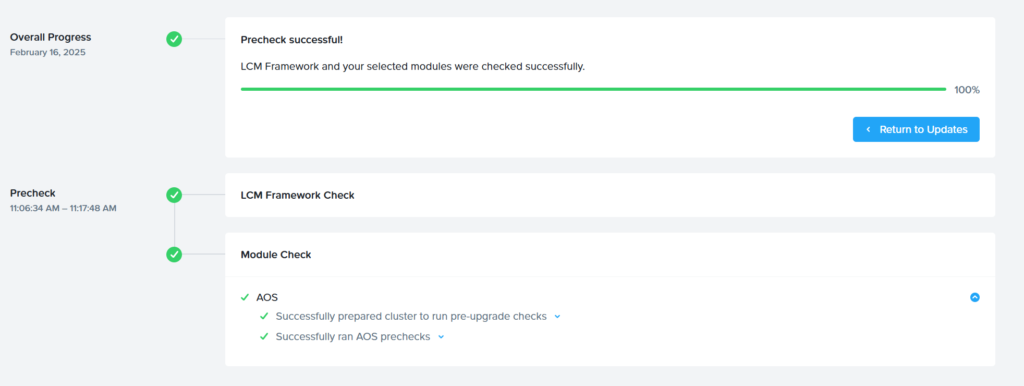
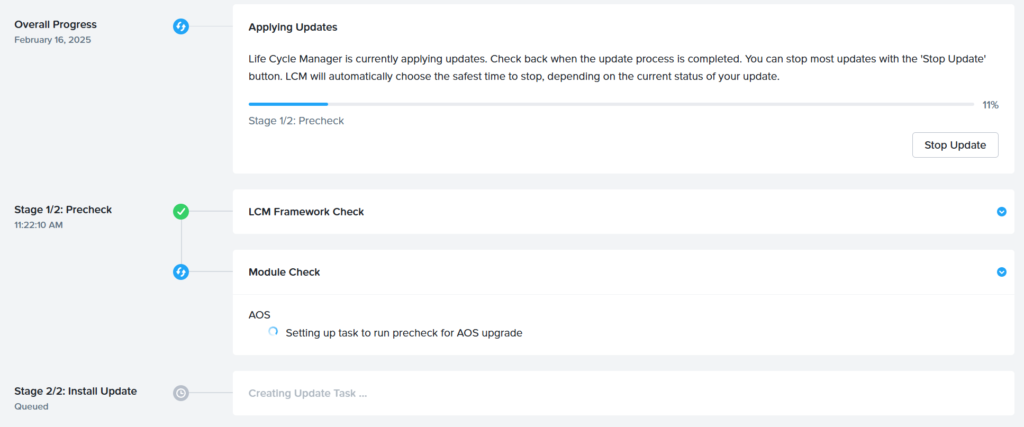
再度プレチェックが実施されるが、事前に確認しているため、安心して眺めることができるはずだ。
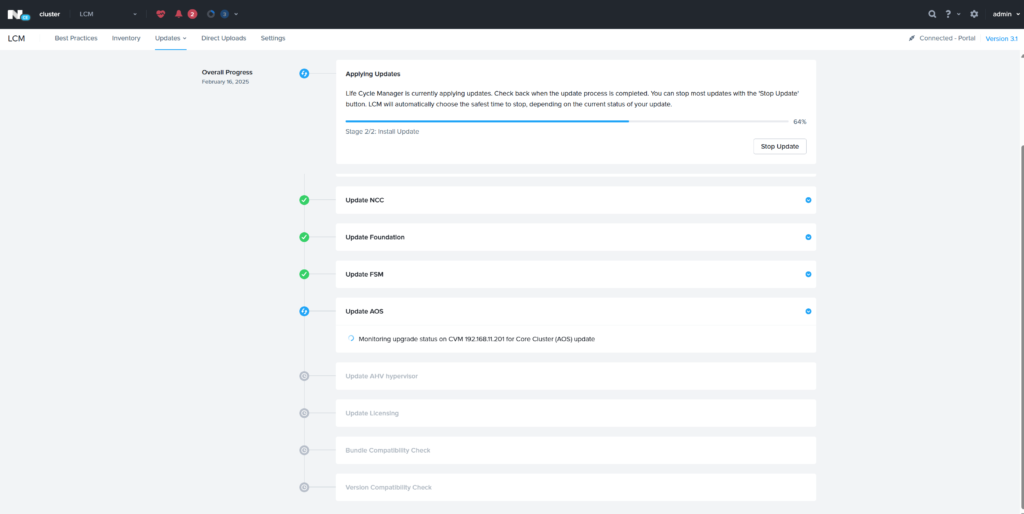
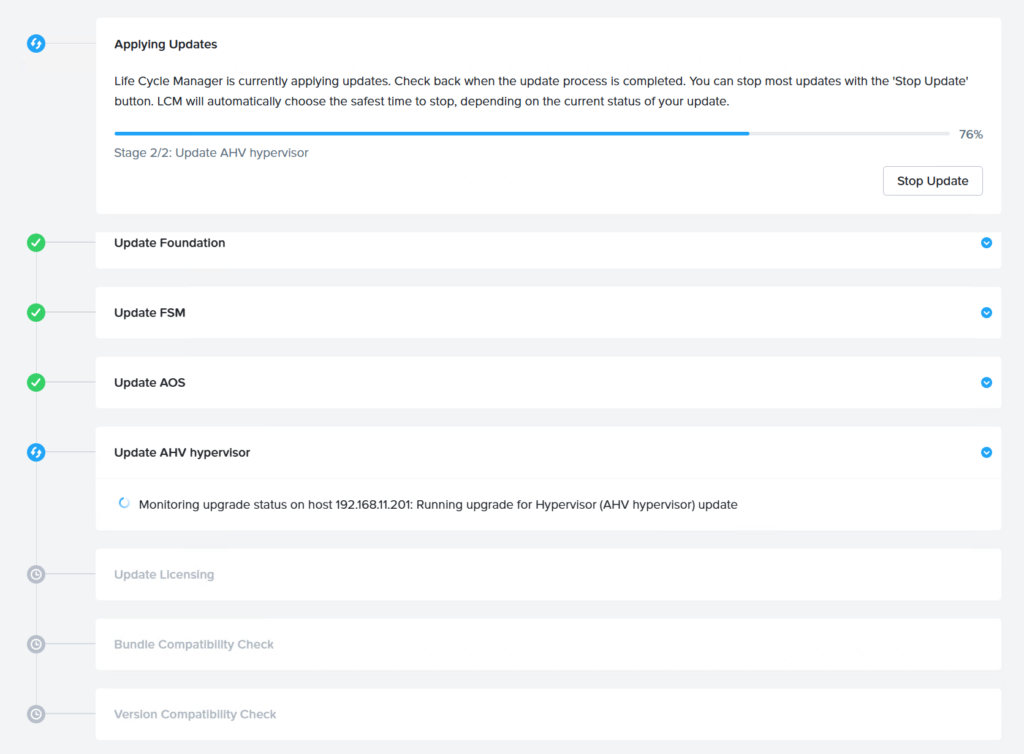
数十分後、順次コンポーネントがアップデートされている。
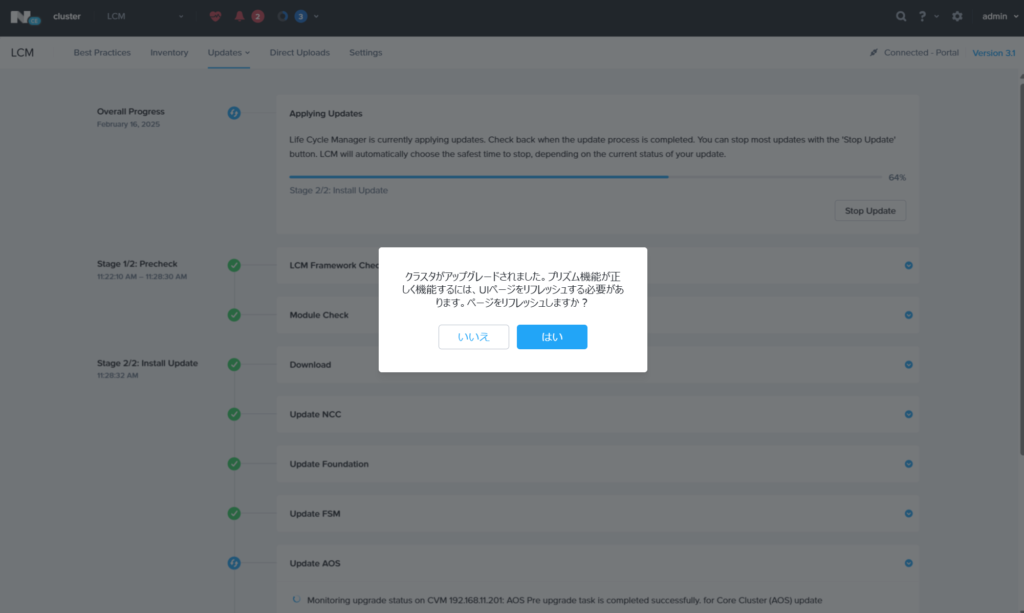
更に数十分経過すると下図の内容が表示されるため、画面の指示にしたがってブラウザをリフレッシュする。
更にバージョンアップ作業が継続される。
1時間くらで、すべてのアップデートが完了した
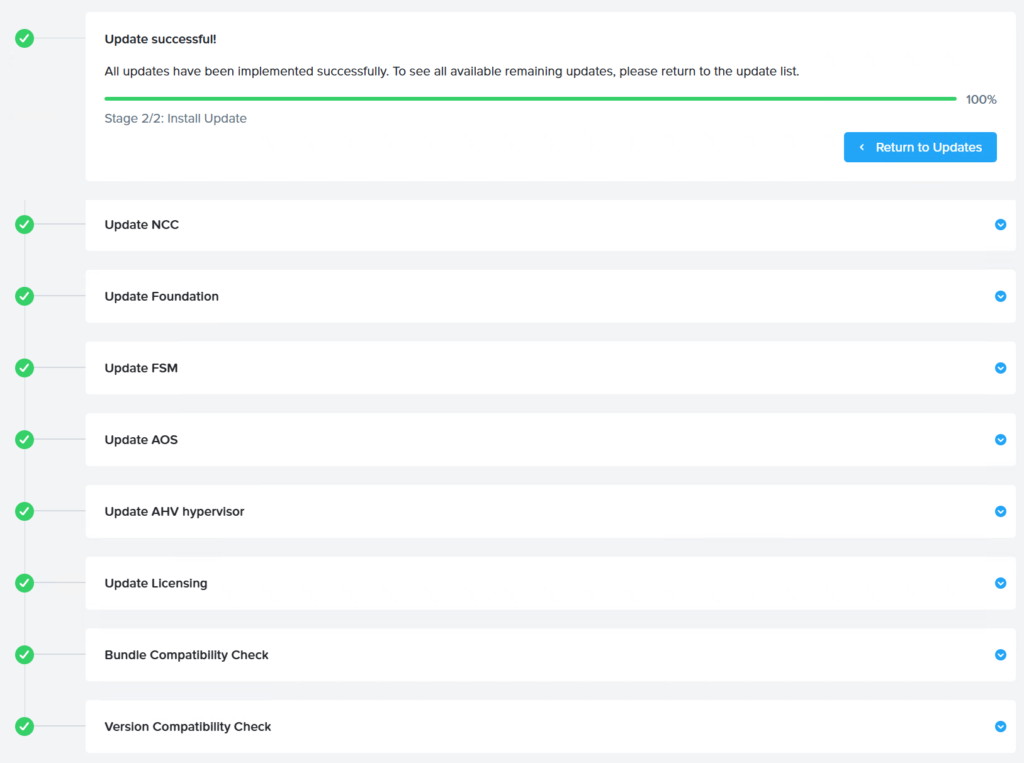
メモ終了。
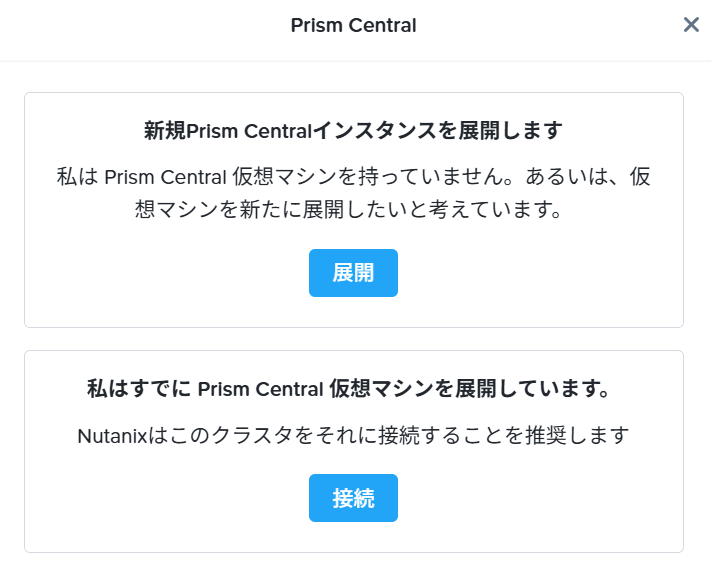
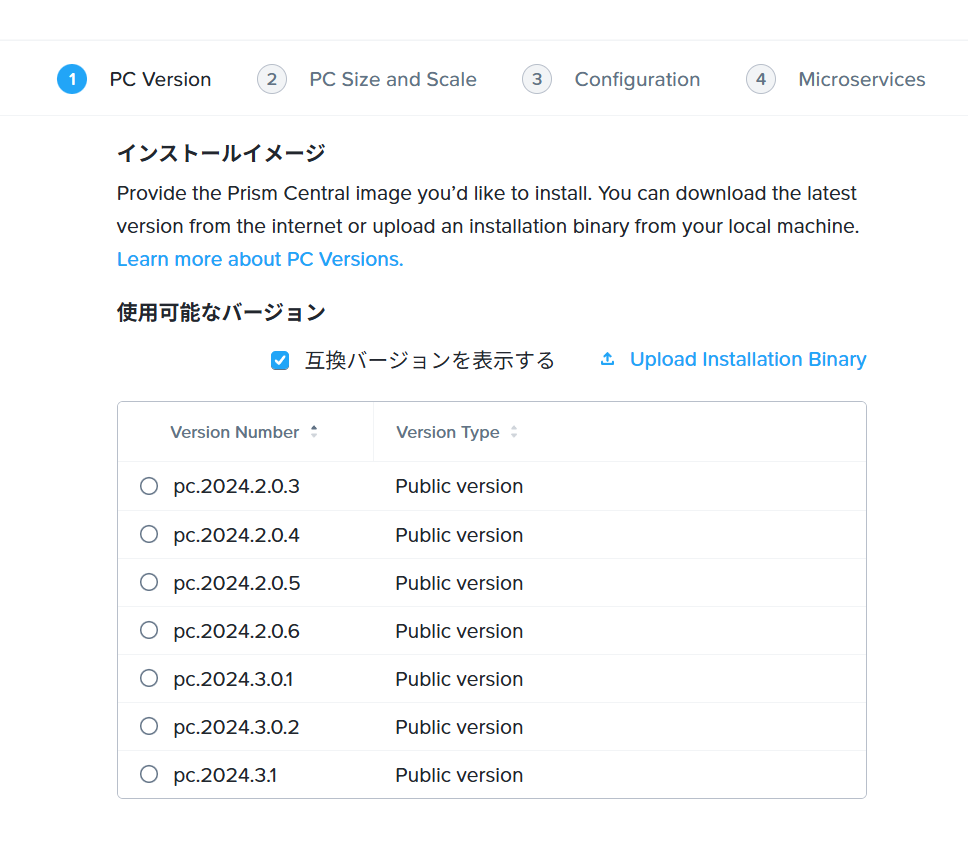
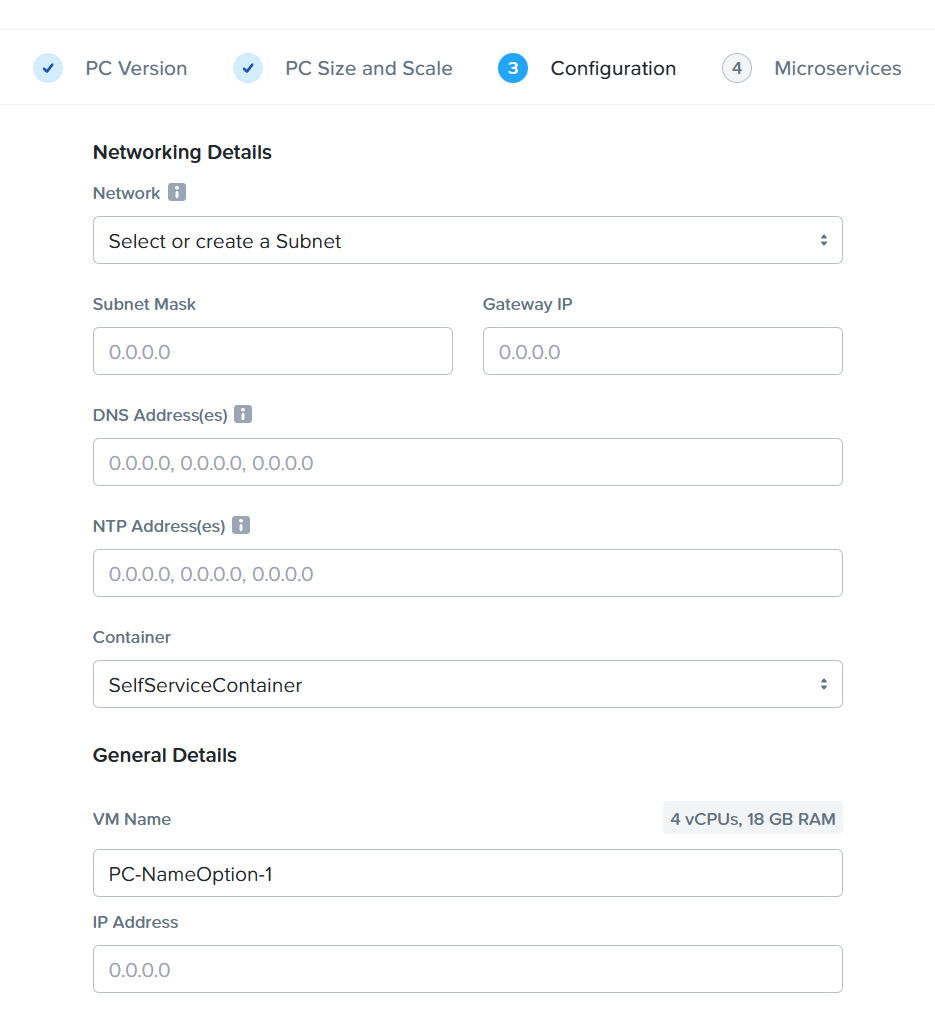
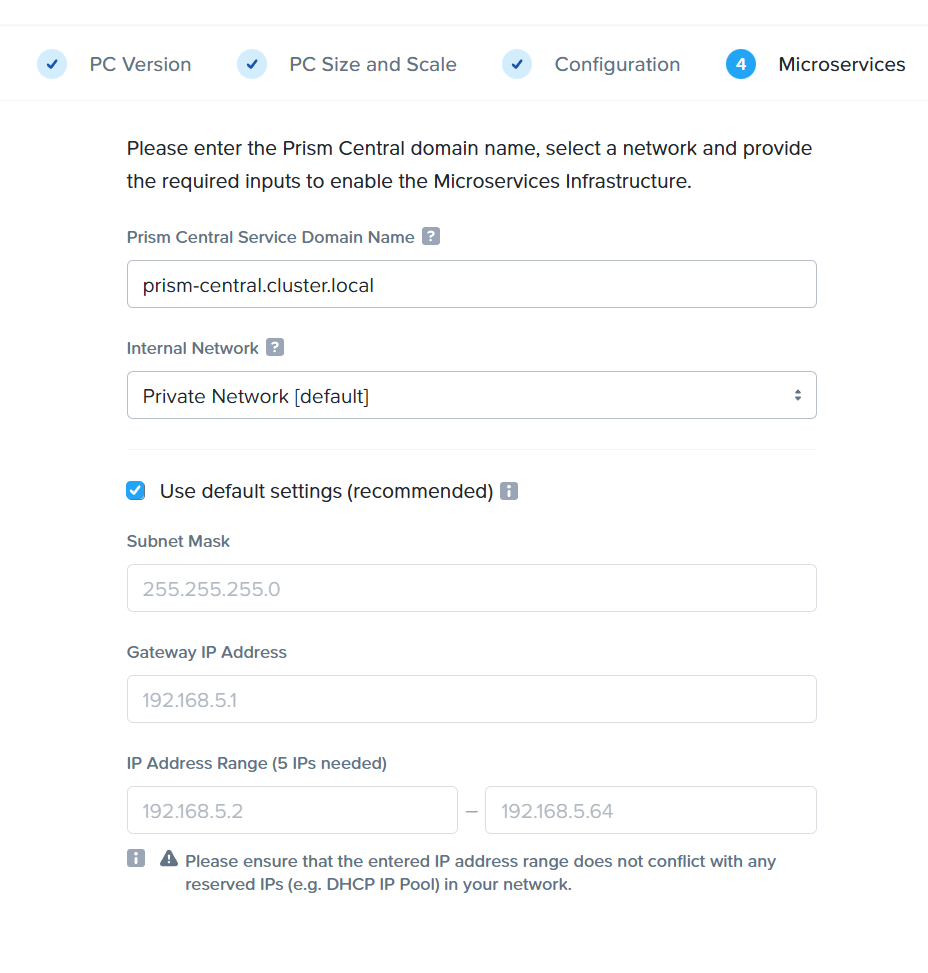
Prism Centralのインストール